E-Paper, E-Ink Display အသုံးပြုခြင်း
E-Paper (Electronic paper) ကို Electrophoretic display လို့လည်း ခေါ်ဆိုပြီး display device အမျိုးအစားတစ်ခု ဖြစ်ပါတယ်။ E-ink (Electronic ink) လို့လည်း ခေါ်ဆိုကြပါတယ်။ အခြား display အမျိုးအစားတွေက အလင်းကို ထုတ်လွှတ်တာ ဖြစ်ပေမယ့် E-paper က စာရွက်ကဲ့သို့ အလင်းကို ရောင်ပြန်ဟပ်ပြီး မြင်ရစေတဲ့ display မျိုး ဖြစ်လို့ နေရောင်ထဲမှာတောင် display ပေါ်မှာပြထားတဲ့ ဒေတာ အချက်အလက်တွေကို ကောင်းစွာမြင်ရပါတယ်။ ဒါပေမယ့် E-paper နည်းပညာ က ဒေတာ ဖော်ပြတဲ့အခါ LCD ကဲ့သို့ low power display နည်းပညာတွေနဲ့ နှိုင်းယှဉ်ရင် refresh rate လွန်စွာနှေးလို့ mouse cursor blink တို့၊ စာသား scroll ပြခြင်းတို့လို fast moving ဖြစ်ရမယ့် အသုံးချနေရာတွေမှာဆို အဆင်မပြေပါဘူး။ ယခု အသုံးပြုမယ့် Waveshare ကထုတ်တဲ့ E-paper display module ဆိုရင် full refresh time က ၁၅စက္ကန့်တောင် ကြာပါတယ်။ Amazon က ထုတ်တဲ့ Kindle Tablet ကလည်း E-ink system ကို သုံးထားတဲ့ display အမျိုးအစားဖြစ်ပြီးတော့ ယခုအချိန်မှာ 67times per second အထိ refresh rate မြန်တဲ့ E-paper prototype တွေတောင် ထွက်ရှိနေပါပြီ။
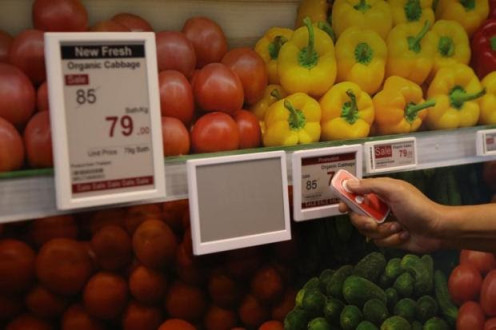
ဒါပေမယ့် E-paper display က Low Power Consumption ဖြစ်ခြင်း၊ 170° အထိ viewing angle ရှိခြင်း၊ အခြား display တွေနဲ့ မတူပဲ နေရောင်ပြင်းပြင်း အောက်မှာပင် ဒေတာအချက်အလက်တွေ မြင်ရနိုင်ခြင်း၊ display module ကို ပါဝါဖြုတ်လိုက်သော်လည်း ဖော်ပြထားတဲ့အချက်အလက်တွေ ကျန်ရှိနေခြင်း စတဲ့ အားသာချက်များစွာ ရှိပါတယ်။ အရွယ်အစားအမျိုးမျိုးရှိတဲ့ E-paper တွေကို Newspaper, E-book reader တွေသာမက digital photo frame တွေ၊ digital signage တွေ၊ information board တွေ အဖြစ် အသုံးပြုကြပြီး အထက်ပါပုံမှာ ဖော်ပြထားသလို အလွယ်တကူ ဈေးနှုန်း update လုပ်နိုင်တဲ့ Electronic Shelf Labels တွေ အဖြစ်လည်း အသုံးပြုကြပါတယ်။
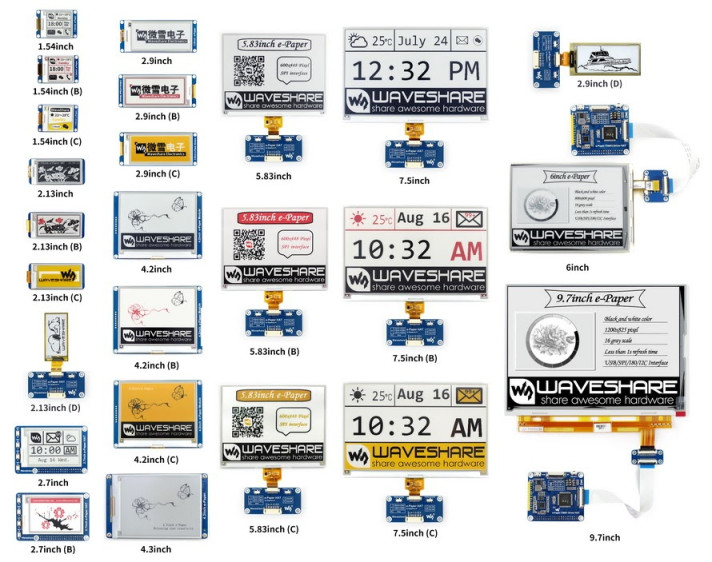
ပုံ ၊ E-paper Display Module အရွယ်အစားအမျိုးမျိုး
E-paper display ကို Raspberry Pi နဲ့ ချိတ်ဆက်အသုံးပြုဖို့ Waveshare က ထုတ်တဲ့ display module အရွယ်အစားမျိုးစုံကို အသုံးပြုနိုင်ပြီး ယခု အသုံးပြု ပြသွားမှာက 296×128 pixels, 2.9inch အရွယ်အစားရှိတဲ့ E-paper display module ဖြစ်ပါတယ်။ SPI interface နဲ့ ချိတ်ဆက်ရမှာ ဖြစ်ပြီးတော့ display color အနေနဲ့ အနီရောင်၊ အနက်ရောင်နဲ့ နောက်ခံအဖြူရောင် ဖော်ပြနိုင်ပါတယ်။ Ultra low power consumption ဖြစ်ပြီး ပုံမှန်အားဖြင့် display refresh ပြုလုပ်တဲ့ အချိန်မှသာ 26.4mW ခန့်ပဲ သုံးစွဲပါတယ်။ Display Module ရဲ့ Pin တွေကို Raspberry Pi နဲ့ အောက်ပါအတိုင်း ချိတ်ဆက်ပေးရပါမယ်။
| E-Paper Display Module Pin | Raspberry Pi Pin |
|---|---|
| BUSY | BCM24 (Physical pin 18) |
| RST | BCM17 (Physical pin 11) |
| DC | BCM25 (Physical pin 22) |
| CS | CE0 (Physical pin 24) |
| CLK | SCLK (Physical pin 23) |
| DIN | MOSI (Physical pin 19) |
| GND | GND |
| VCC | 3.3V |
ချိတ်ဆက်ပြီးရင် Waveshare E-paper အရွယ်အစားမျိုးစုံအတွက် Python Library တွေကို အောက်ပါ command အတိုင်း download ဆွဲယူထားလိုက်ပါ။
$ git clone https://github.com/soonuse/epd-library-python
Python Library ဖိုင်တွေ ရယူပြီးသွားရင် cd command နဲ့ directory ပြောင်းပြီး list ခေါ်ကြည့်ပါက E-paper မျိုးစုံအတွက် Folder တွေ တွေ့ရပါမယ်။
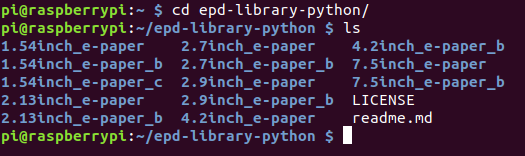
ပုံ ၊ epd-library-python Directory သို့ ဝင်ရောက်ခြင်း
ကိုယ်အသုံးပြုတဲ့ display အရွယ်အစားပေါ်မူတည်ပြီး directory ထပ်မံရွေးချယ် ဝင်ရောက်နိုင်ပါတယ်။ ယခု ဖော်ပြမယ့် display က 2.9inch e-paper Model B အမျိုးအစားဖြစ်လို့ အောက်ပါအတိုင်း directory ဝင်ရောက်လိုက်ပါတယ်။

ပုံ ၊ 2.9inch_e-paper_b Directory သို့ ဝင်ရောက်ခြင်း
2.9inch_e-paper_b အောက်က raspberrypi/python အထိ ဝင်ရောက်ပြီးလို့ list ခေါက်ကြည့်လိုက်ရင် တွေ့ရတဲ့ main.py ဆိုတဲ့ဖိုင်ကို run ကြည့်ရင် Waveshare Logo ကို E-paper Display မှာ ဖော်ပြပေးတာကို တွေ့ရပါလိမ့်မယ်။
$ sudo python main.py
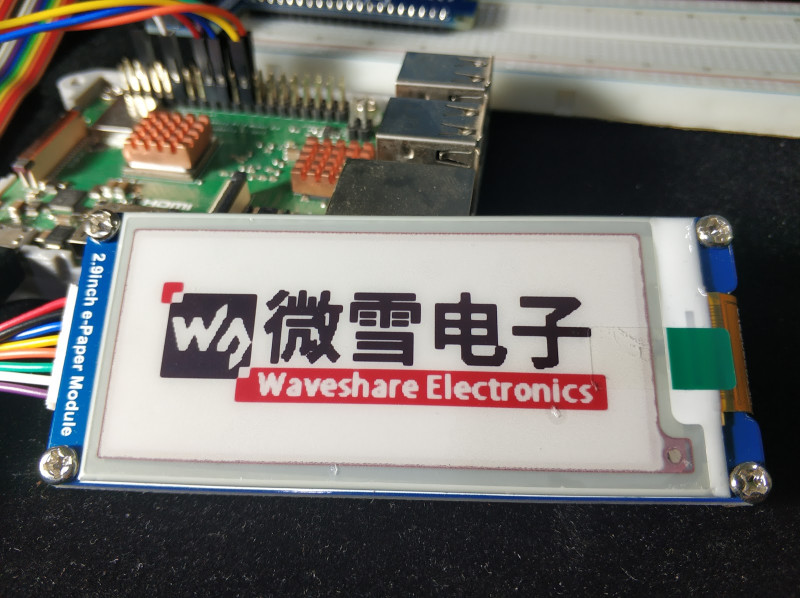
ပုံ ၊ E-paper display တွင် Waveshare Logo ဖော်ပြခြင်း
E-paper ချိတ်ဆက်မှုအဆင်ပြေပြီး Logo ဖော်ပြနိုင်ပြီဆိုရင် စာသားဖော်ပြဖို့ ဒီ Directory အောက်မှာပဲ ePaperDemo.py ဆိုတဲ့ ဖိုင်တည်ဆောက်ပြီး အောက်ပါ program တွေကို ကူးထည့်ကာ စမ်းသပ်ကြည့်ပါ။
$ sudo nano ePaperDemo.py
import epd2in9b
from PIL import Image, ImageFont, ImageDraw
COLORED = 1
UNCOLORED = 0
def main():
epd = epd2in9b.EPD()
epd.init()
epd.set_rotate(1)
frame_black = [0xFF] * (epd.width * epd.height / 8)
frame_red = [0xFF] * (epd.width * epd.height / 8)
font = ImageFont.truetype('/usr/share/fonts/truetype/freefont/FreeMonoBold.ttf', 30)
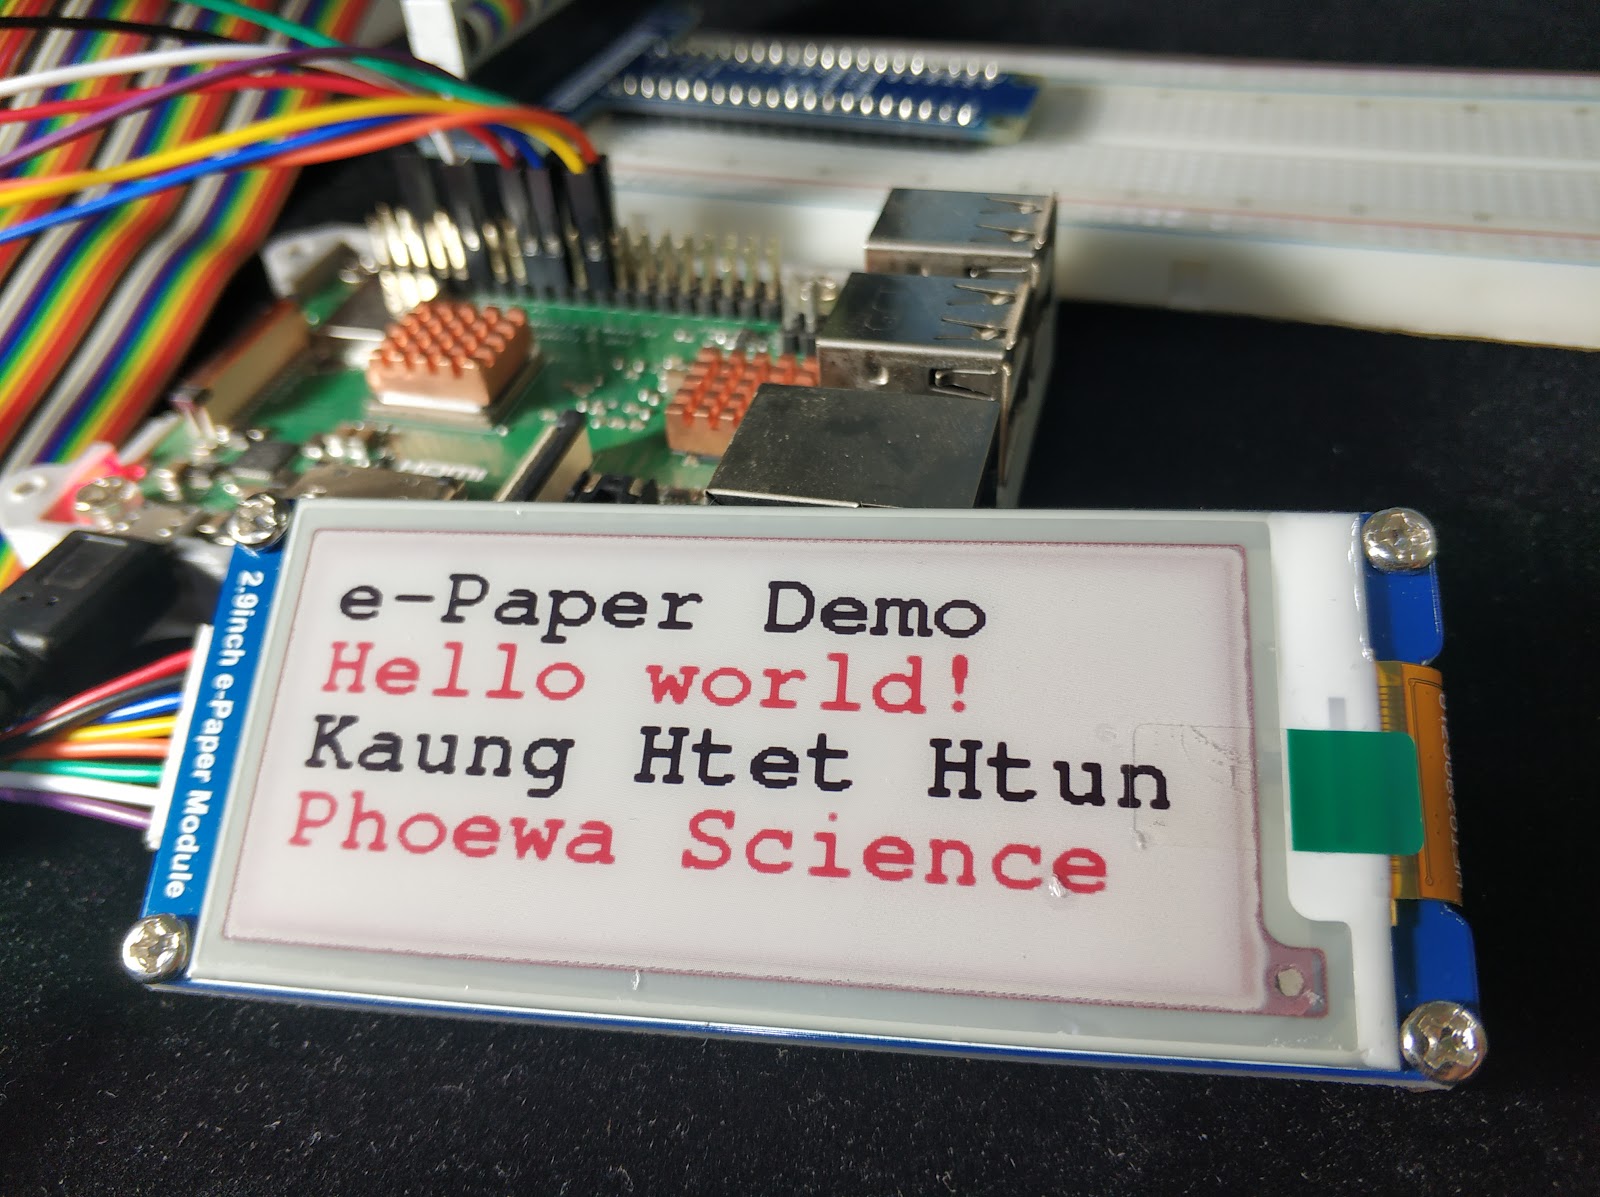
epd.draw_string_at(frame_black, 10, 5,"e-Paper Demo", font, COLORED)
epd.draw_string_at(frame_red, 10, 30, "Hello world!", font, COLORED)
epd.draw_string_at(frame_black, 10, 55, "Kaung Htet Htun", font, COLORED)
epd.draw_string_at(frame_red, 10, 80, "Phoewa Science", font, COLORED)
epd.display_frame(frame_black, frame_red)
if __name__ == '__main__':
main()$ sudo python ePaperDemo.py
Program ရဲ့ ထိပ်ဆုံးမှာ import ထားတဲ့ epd2in9b ဖိုင်က 2.9inch_e-paper_b အောက်က raspberrypi/python Directory အောက်မှာပဲ တည်ရှိနေပြီး E-paper မှာ ဒေတာတွေ ဖော်ပြဖို့အတွက် လိုအပ်တဲ့ အချက်အလက်အားလုံးကို ဒီဖိုင်ထဲမှာ ရေးထားပါတယ်။ image တွေ၊ font တွေ ဖော်ပြဖို့အတွက်လိုအပ်တဲ့ PIL (Pillow Library) ကိုတော့ OLED display စမ်းသပ်စဉ်က ထည့်သွင်းခဲ့ပြီးသား ဖြစ်ပါတယ်။ epd.set_rotate(1) မှာ တန်ဖိုးတွေ ပြောင်းထည့်ပြီး Display orientation ကို သတ်မှတ်နိုင်ပါတယ်။ ပုံမှန်အားဖြင့် ဒီ Function မထည့်ရင် E-paper မှာ ဖော်ပြမယ့် စာသားတွေက ဒေါင်လိုက်ဖြစ်နေမှာဖြစ်ပြီး 90° ပြောင်းလိုရင် 1, 180° ပြောင်းလိုရင် 2, 270° ပြောင်းလိုရင် 3 လို့ သတ်မှတ်ပြီး display ကို လှည့်နိုင်ပါတယ်။ frame_black = [0xFF] * (epd.width * epd.height / 8) နဲ့ frame_red = [0xFF] * (epd.width * epd.height / 8) ကတော့ display ကို clear ဖို့ ဖြစ်ပါတယ်။
အသုံးပြုလိုတဲ့ Font ကို ImageFont.truetype နဲ့ path လမ်းကြောင်းခေါ်ယူပြီး Font size 30 လို့ သတ်မှတ်လိုက်ပါတယ်။ ပြီးတဲ့နောက် draw_string_at နဲ့ စာသား ရေးထုတ်ရုံပဲဖြစ်ပါတယ်။ frame_black နဲ့ frame_red က အရောင် ရွေးချယ်ပြသဖို့ ဖြစ်ပြီး ဂဏာန်းတွေက pixel အကွက် တန်ဖိုးတွေ ဖြစ်ပါတယ်။ နောက်ဆုံးက COLORED ကို UNCOLORED လို့ ပြောင်းပြီး မဖော်ပြလိုတဲ့ စာသားတွေကို ပိတ်လို့ရပါတယ်။ display_frame ကတော့ သတ်မှတ်ထားတဲ့ frame တွေကို display မှာ ပြသဖို့အတွက် သုံးရပါတယ်။
ကိုယ့်စိတ်ကြိုက် ပုံတွေ E-Paper မှာ ပြသနိုင်ဖို့ကတော့ width နဲ့ height တန်ဖိုး 296×128 pixels ရှိတဲ့ ပုံတွေ ဖန်တီးရပါမယ်။ ပုံတွေ ဖန်တီးတဲ့အခါမှာလည်း အရောင် ၂ရောင်တည်း ရှိတဲ့ ရိုးရိုးရှင်းရှင်းပုံတွေ ဖြစ်ဖို့ လိုပါတယ်။ အောက်ပါ နမူနာမှာ Raspberry Pi Logo ရဲ့ အနီရောင်အသီး အလုံးလေးတွေကို တစ်ပုံသီးသန့် ဖန်တီးပြီး၊ အနက်ရောင်နဲ့ စာသားတွေကို တစ်ပုံသီးသန့် ဖန်တီး လိုက်ပါတယ်။ အနီရောင်ပေါ်စေလိုတဲ့ ပုံကို red.jpg ၊ အနက်ရောင်ပေါ်စေလိုတဲ့ ပုံကို black.jpg ဆိုတဲ့ နာမည်တွေ ပေးပါ။ ပြီးရင် pi_logo_epd.py Program ဖိုင်နဲ့အတူ directory တစ်ခုတည်းမှာ ပုံတွေကို ဒေါင်လိုက်အနေအထား (128×296 pixels) ပုံစံနဲ့ ထည့်ပေးရပါမယ်။ ပုံတွေ ထည့်ပြီးသွားရင် အောက်ပါ program ကို ကူးယူစမ်းသပ်ကြည့်ပါ။
$ sudo nano pi_logo_epd.py
import epd2in9b
from PIL import Image, ImageFont, ImageDraw
COLORED = 1
UNCOLORED = 0
def main():
    epd = epd2in9b.EPD()
    epd.init()
    #epd.set_rotate(1)
    frame_black = [0xFF] * (epd.width * epd.height / 8)
    frame_red = [0xFF] * (epd.width * epd.height / 8)
    frame_black = epd.get_frame_buffer(Image.open('black.jpg'))
    frame_red = epd.get_frame_buffer (Image.open('red.jpg'))
    epd.display_frame(frame_black, frame_red)
if __name__ == '__main__':
    main()
$ sudo python pi_logo_epd.py
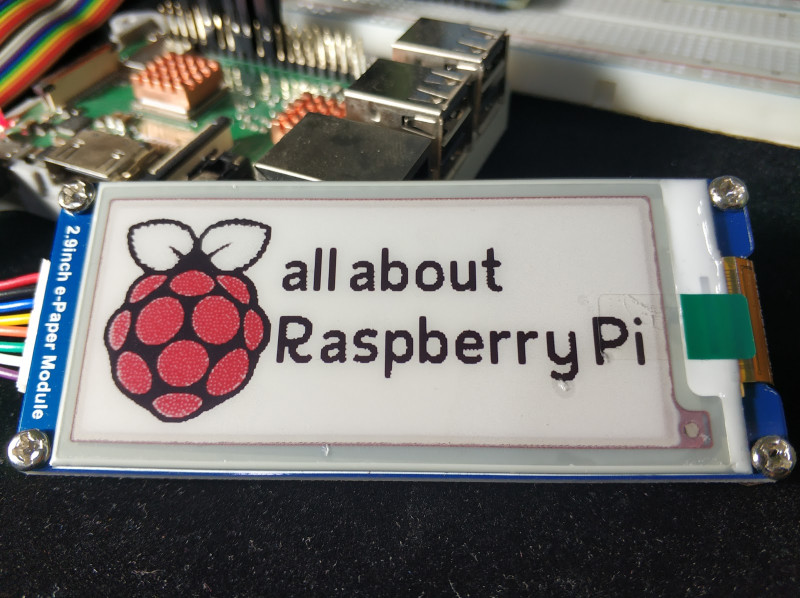
ပုံ ၊ E-paper တွင် image များ ဖော်ပြခြင်း
ဒီလိုနည်းအတိုင်း တခြား image file တွေကိုလည်း E-paper မှာ ပြသနိုင်ပါတယ်။